One powerful feature of the Studio Artist Vectorizer is Region Effects.

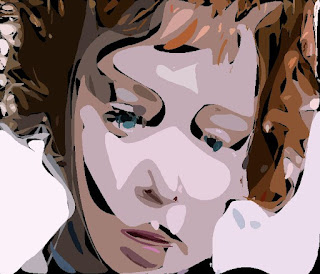
There's a wide variety of different stylistic effects you can create by working with different Region Effect Options. Region Effect modify the shapes generated by the vectorizer processing. After stylizing the vector region shapes, when they are overlaid on the canvas they typically will no longer provide total coverage. There are different background color options you can pick to provide a solid color background the stylized shapes can be overlaid on top of. An example of stylized vector shapes on top of a black background is shown below.

Suppose you want to create a stylized vector effect that covers the entire canvas. How can you do this?
There are several different approaches. A simple one is to do 2 vectorizer passes. The first pass uses no region effects. The second pass uses a region effect with the Background Fill option in the vectorizer Drawing control panel set to None. The 2nd pass overlays it's stylized regions on top of the previous non-stylized vectorizer output which does cover the entire canvas.
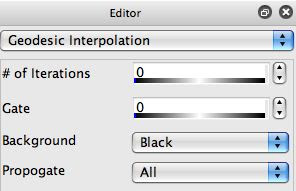
A different 2-pass approach is to first interpolate the solid background color areas with adjacent region colors using an Image Operation (Ip Op), and then rerun the vectorizer to vectorize the filled in solid color regions. An easy way to do this is to use the Geodesic Interpolation Ip Op. The settings i used to fill in the black background areas by extrapolating the existing color informaiton in the image is shown below.

You want to make sure you use the Pixel Raster Fill setting for the Canvas Render Option if you will be interpolating in the solid background color areas with an Ip Op. You use this setting so that you get hard edges at the region boundaries.

The Vector Anti-Alias setting will provide smooth anti-aliased edges. If you try to use this setting's vectorizer output with the Geodesic Interpolation Ip Op you will fill the solid background areas with the anti-aliased region rim color which is not the same as the solid interior color.
After filling in the solid color background, you may be finished or you may need one more step. If you were just interested in generating a raster version of the vectorizer effect then you are finished. If your goal was to generate vector output like an eps or svg file, then you now need to re vectorize the raster interpolated canvas created by the Geodesic Interpolation Ip Op.
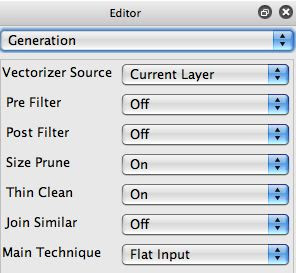
Do do this, you want to use the Flat Color vectorizer Technique, as shown below. This technique assumes the input is already composed of flat colored regions and vectorizes them accordingly. Note that we are using the current layer as the vectorizer source since we are processing the output of the geodesic interpolation ip op that is in the current layer. You also want to make sure you turn off Region Effects when doing this second flat color technique vectorizer pass.

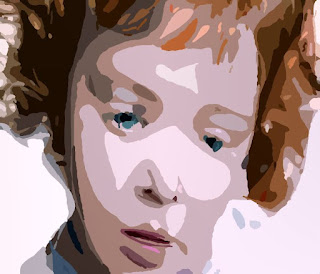
The final stylized vector output is shown below. Note how the stylized image totally covers the canvas with no show through to a solid color background.

Labels: vectorizer


